Step-By-Step Guide
1. Make necessary substructure repairs.

2. Sand off all existing texture

3. Make pattern of area and transfer to back side of FLEX-MOLD

Cut to shape, making sure to leave 1/2”-3/4” (12-19mm) border.
4. The background color of the area to be textured must be of like and even color

To achieve this, gelcoat should be thinned with appropriate thinner or styrene and sprayed on thick enough to give an even color. Let cure thoroughly. If *surfacing agent is used in your gelcoat, it must be removed by sanding, along with solvent wipe to assure a proper bond with textured coat.
*A surfacing agent is a solution containing paraffin wax. When added to gelcoat or polyester resin, it will rise to the surface during cure cycle to seal off air. Exposure to air will prevent a complete surface cure. If no surfacing agent is used, the surface will remain slightly tacky in the shade and extremely sticky in the sun. Avoid exposure to sun during next step.
5. Lay FLEX-MOLD in place to check fit

Secure determined starting edge with tape. Check fit and make sure overlapping border lays down flat and is not held up by wrinkles in the tape or other objects. A seal must be formed around edge that will not allow air to bleed gelcoat down before it can cure.
Note: The FLEX-MOLD is coated with green polyvinyl alcohol (PVA) to serve as a release agent as well as a barrier coat that prevents a chemical reaction that will occur between the FLEX-MOLD and gelcoat, resulting in a distorted pattern.
6. Lightly sprinkle backside of FLEX-MOLD with talcum powder

…for a lubricant. Remove excess.
7. Prepare gelcoat by checking viscosity

…with a viscosity measuring cup. Gelcoat should run through a Zahn Cup #2 in 60-65 seconds and Ford Cup #4 in 40-45 seconds. Be sure to clean cup between each test. Gelcoat may be thinned with some of the following products with varied results: Duratech Clear, Patch Boost, Patch Aid. DO NOT USE ACETONE. The gelcoat must be fluid enough to flow into the cavities of the non-skid pattern to avoid air entrapment. Also, thick gelcoat makes it difficult to squeegee FLEX-MOLD down level over large areas. Catalyze gelcoat cool enough to allow sufficient cure time to complete procedure.
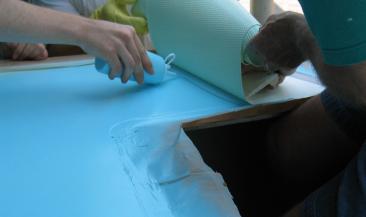
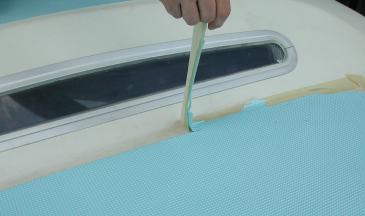
Hold FLEX-MOLD up and pull back to secure end. Pour enough gelcoat to start a wave in front of and across entire width of FLEX-MOLD as not to leave any air bubbles trapped. Use a stick as illustrated in spot repair #9 to push gelcoat up under FLEX-MOLD if necessary.
8. Use a proper tool (squeegee, board, paint roller)


…to push along behind the FLEX-MOLD in a manner that will move a wave of gelcoat before the face of the FLEX-MOLD as it is lowered into the wave. Add gelcoat as needed and continue process across entire area.
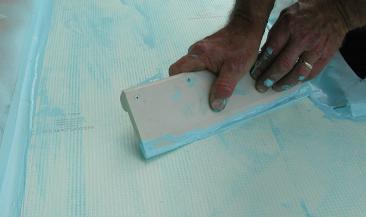
9. Once FLEX-MOLD is down, start in the middle and push


…with a squeegee, excess gelcoat out from under FLEX-MOLD. Squeegee across in all directions. Run hand over surface to feel out any high spots that will need to be squeegeed out. Use some of excess gelcoat to lubricate the squeegee it will slide easily. You may use acetone sparingly to wipe back of the FLEXMOLD clean if you intend to reuse it. Squeegee should be of adequate size for size of the application, stiffened up to help apply even pressure across width of squeegee.
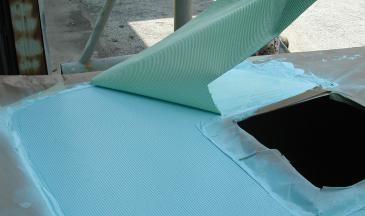
10. Let gelcoat cure and peel off FLEX-MOLD


Remove masking from around the border. Sand and polish edges using graduated grit. Starting with 100, 220, 320, 500, then compound and polish.
11. Finished product

The FLEX-MOLD can be used repeatedly as long as the PVA coating is intact. Once PVA has begun to come off the FLEXMOLD, wash the remaining PVA off with water. Let FLEX-MOLD dry and reapply PVA with a spray gun by misting


